Is it possible to run bsdinstall using Raspberry Pi 4?

Hello,
I'm getting started with Raspberry Pi 4 and FreeBSD.

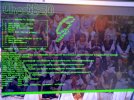
I'm trying to run bsdinstall on a Raspberry Pi 4 , I have the FreeBSD 14.0-CURRENT written on a SD card that I use to boot the raspberry, I connected an external ssd on the raspberry and I'm trying to run the bsdinstall command to try to install the system on the SSD.
I can select the keyboard layout, and choose the way I want the disk to be partitioned.

I have internet connection and external SSD.

IMG_6315.jpeg


Best regards.
 
Thanks for the very nice looking pictures. This information you posted should help the next guy. The 14.0 Kernel has NOT be RELEASED just yet. Start with either 13.2 RELEASE or 15.0 CURRENT Look, I only know a Little more than you do having been down the road and hit the bumps a few miles before you.
You can help me by testing and proof reading what I wrote in my blog ghostbsd-arm64.blogspot.com search word compile Sept 7 2022 entry read that email fred@thegalacticzoo.com Great luck on your new journey in FreeBSD on Raspberry Pi 4B. How much dram memory 4G or 8GB.

I did get ZFS boot root on ZFS for Pi running on my 1TB (500GB ??) USB SSD. https://ghostbsd-arm64.blogspot.com/2023/07/learning-zfs-on-root-setup-for.html I have it running Poudriere Build and Nginx Web server to serve packages to a 2nd Raspberry Pi 4B.

Practice with a 16GB or 32GB USB flash drive to use BSDinstall. BSDInstall worked fine for me. I had previously setup partitions with a Linux script parted for the all the partitions that I created. Then:
Code:
gpart modify -i 3 -t freebsd-ufs /dev/da1   or  -t freebsd-zfs /dev/da1
use  gpart  -a4k -s 260M -i 1 -t msdosfs /dev/da1
or use gpart -a1M       Take note to align the start of a partition on either a 4k (not 512 byte) or 1 megabyte boundary. Internally the SSD uses 4K byte blocks  (not hard disk 512 byte blocks , like old days)  So you start your partitions on 4 kilobyte boundaries or 1 Megabyte boundaries[code]
Disk Information on a FreeBSD system:
[code]camcontrol devlist
geom disk list
gpart status
gpart show -lp
Code:
df -h
mount
vmstat
pkg bootstrap -f
zfs mount
zfs  get  mounted,canmount,mountpoint,setuid,atime,exec  zroot/ROOT/default
cat  /boot/loader.conf   ;  cat /boot/default/loader.conf
cat /etc/rc.conf
ifconfig genet0
dhclient genet0
ping -c 3 1.1.1.1
ping -c 3 8.8.4.4
ping -c 3 he.net     Hurricane Electric in Fremont California  easy to type 6 characters to an IP6 backbone ISP provider
cat /etc/resolv.conf
cat /etc/hosts
cat /etc/host.conf
drill he.net

Some more miscellaneous command when I can remember them


Robonuggie FreeBSD and GaryHTech FreeBSD Videos in What Feature of FreeBSD 14 do you like
Search my other posts for Raspberry Pi information you can use.
 

Attachments

  • photo_2023-09-29_15-02-47.jpg
    photo_2023-09-29_15-02-47.jpg
    253 KB · Views: 64
I have the FreeBSD 14.0-CURRENT
Old stuff, 14.0-CURRENT doesn't exist any more.

Start with either 13.2 RELEASE or 15.0 CURRENT
No. -CURRENT is an unsupported development version. Use 13.2-RELEASE or the latest release candidate of 14.0, RC3 should be available now (it might take a day or two for everything to catch up).


Thanks for the very nice looking pictures.
We should not be encouraging people taking screenshots with a camera.

I don't know about the OP but I have been able to use the FreeBSD installer with arm64.
The snafu there is you also need to flash the port of u-boot to your installation disk as well.
So what I do is copy u-boot from /usr/local/share/u-boot/ to the installer image.
At the end of the installation I drop to shell and flash u-boot.
(Flashing u-boot for RPi is as simple as copying files.)


Running bsdinstall from a running installation is not the correct method.
 
The snafu there is you also need to flash the port of u-boot to your installation disk as well.
So what I do is copy u-boot from /usr/local/share/u-boot/ to the installer image.
At the end of the installation I drop to shell and flash u-boot.

Hi Phishfry,
So just to understand what you do, you mount the installer image and copy the u-boot in it at a different location.
Once the installation is finished you switch the u-boot installed by the one you copied. Am I right?
 
Thanks for the very nice looking pictures. This information you posted should help the next guy. The 14.0 Kernel has NOT be RELEASED just yet. Start with either 13.2 RELEASE or 15.0 CURRENT Look, I only know a Little more than you do having been down the road and hit the bumps a few miles before you.
You can help me by testing and proof reading what I wrote in my blog ghostbsd-arm64.blogspot.com search word compile Sept 7 2022 entry read that email fred@thegalacticzoo.com Great luck on your new journey in FreeBSD on Raspberry Pi 4B. How much dram memory 4G or 8GB.

I did get ZFS boot root on ZFS for Pi running on my 1TB (500GB ??) USB SSD. https://ghostbsd-arm64.blogspot.com/2023/07/learning-zfs-on-root-setup-for.html I have it running Poudriere Build and Nginx Web server to serve packages to a 2nd Raspberry Pi 4B.

Practice with a 16GB or 32GB USB flash drive to use BSDinstall. BSDInstall worked fine for me. I had previously setup partitions with a Linux script parted for the all the partitions that I created. Then:
Code:
gpart modify -i 3 -t freebsd-ufs /dev/da1   or  -t freebsd-zfs /dev/da1
use  gpart  -a4k -s 260M -i 1 -t msdosfs /dev/da1
or use gpart -a1M       Take note to align the start of a partition on either a 4k (not 512 byte) or 1 megabyte boundary. Internally the SSD uses 4K byte blocks  (not hard disk 512 byte blocks , like old days)  So you start your partitions on 4 kilobyte boundaries or 1 Megabyte boundaries[code]
Disk Information on a FreeBSD system:
[code]camcontrol devlist
geom disk list
gpart status
gpart show -lp
Code:
df -h
mount
vmstat
pkg bootstrap -f
zfs mount
zfs  get  mounted,canmount,mountpoint,setuid,atime,exec  zroot/ROOT/default
cat  /boot/loader.conf   ;  cat /boot/default/loader.conf
cat /etc/rc.conf
ifconfig genet0
dhclient genet0
ping -c 3 1.1.1.1
ping -c 3 8.8.4.4
ping -c 3 he.net     Hurricane Electric in Fremont California  easy to type 6 characters to an IP6 backbone ISP provider
cat /etc/resolv.conf
cat /etc/hosts
cat /etc/host.conf
drill he.net

Some more miscellaneous command when I can remember them


Robonuggie FreeBSD and GaryHTech FreeBSD Videos in What Feature of FreeBSD 14 do you like
Search my other posts for Raspberry Pi information you can use.
I'm an IT studant, for me is going to be a pleasure to learn with experienced people. My Raspberry has 4GB of RAM and the external SSD has 128GB.

Old stuff, 14.0-CURRENT doesn't exist any more.


No. -CURRENT is an unsupported development version. Use 13.2-RELEASE or the latest release candidate of 14.0, RC3 should be available now (it might take a day or two for everything to catch up).


Thanks for the advice. If necessary, I will just publish posts about RELEASES versions. I'm a new member of FreeBSD users, I'm learning the basics.

We should not be encouraging people taking screenshots with a camera.

I don't know about the OP but I have been able to use the FreeBSD installer with arm64.
The snafu there is you also need to flash the port of u-boot to your installation disk as well.
So what I do is copy u-boot from /usr/local/share/u-boot/ to the installer image.
At the end of the installation I drop to shell and flash u-boot.
(Flashing u-boot for RPi is as simple as copying files.)


Running bsdinstall from a running installation is not the correct method.
I just didn't know what to do, there is a long time that I don't use FreeBSD, I'm learning the basics and the forum rules. Thanks for the url and the advice of how to install FreeBSD using memstick img.
 
I vaguely recall that you can use a serial console over USB if you want screenshots of the installer. I'd recommend that OP google how to do that. It will make it easier to take screenshots of the installer...

Phishfry , maybe we can go easy on the newcomers... Screenies and text dumps are usually possible after the OS has been installed (unless you install it inside a VM, rather than metal).

TBF, if I really wanted to get screenshots or text dumps of the installer on bare metal, I'd need to google how to get serial console over USB for myself, and even then, it would take me a few tries.
 
So just to understand what you do, you mount the installer image and copy the u-boot in it at a different location.
Once the installation is finished you switch the u-boot installed by the one you copied. Am I right?
Right. Install the RPi u-boot package of choice.
Copy contents of /usr/local/share/u-boot/u-boot-rpi* to installer image via mounted partition and making new directory for it... You could even put it on a UFS formatted USB drive if desired.
Somehow you have to include u-boot. bsdinstall does not handle that step. Must be done manually.

Another example. For eMMC I use same method.
Burn aarch64 installer image to a memstick. Run it one time to expand extents or manually expand.
Then copy an image to installer that I can flash to eMMC.
After that flash u-boot from same stick and its u-boot directory.
So in this case I would be using LiveCD mode instead of the installer. I like using the installer image.
 
And just to expound on this issue my recommendation here is only good for RPi3/4 installations.

RPi uses a file based u-boot where you can simply copy u-boot files to their proper location.
If you are asking: What is the proper location? Take a look at the FreeBSD dedicated image for RPi.
Study its contents both root partition and EFI partition.

Almost all other Arm boards require dd-ing u-boot to boot sectors of disk. RPi is different.
I think I can understand what you are talking about. After I run bsdinstall, the boot partition needs to be created and mounted manually (by created I want to say copied), right?

Pictures of hardware OK.
Pictures of software not OK.
That is my 2 cents.
2 cents? 😆
It seems very logical for me.
 
After I run bsdinstall, the boot partition needs to be created and mounted manually (by created I want to say copied), right?
The boot partiton (EFI) will be created by bsdinstall. You just need to copy u-boot to it.

Look at it this way. FreeBSD has no u-boot in base source code.

FreeBSD installers are built from base source code. U-boot is added by the release script.

No u-boot is included in base FreeBSD. You must do that step manually or use pre-built images.
 
Right. Install the RPi u-boot package of choice.
Copy contents of /usr/local/share/u-boot/u-boot-rpi* to installer image via mounted partition and making new directory for it... You could even put it on a UFS formatted USB drive if desired.
Somehow you have to include u-boot. bsdinstall does not handle that step. Must be done manually.

Another example. For eMMC I use same method.
Burn aarch64 installer image to a memstick. Run it one time to expand extents or manually expand.
Then copy an image to installer that I can flash to eMMC.
After that flash u-boot from same stick and its u-boot directory.
So in this case I would be using LiveCD mode instead of the installer. I like using the installer image.
I only got RPIs and usually I just use the pre-built images but it can't hurt to know how to do a manual installation, I'll try this method at some point.
Thank you for sharing tips and good explanations.
 
I only have RPi3A and I have had troubles booting from USB medium.
Since storage is nil I thought I would try CFAST on USB adapter.
Failed.
That sent Rpi3 into hibernation. Life is too short.

Viva Rockchip and NVMe on Arm. Rock4A/B are really my current favorite.
RK356x support is getting closer it looks like..
 
Here are two more tips to help you use the aarch64 Memstick Installer LiveCD mode for general use..
1) The installer has network interface configured but no service.
So use dhclient genet0 to bring up the interface with DHCP.

2) The installer will mount the disk in read-only mode. Convert to RW if needed.
mount -o rw /


I also remembered another way I got u-boot onto my installation.
.
At the end of the installation it asks if you want to shell to install stuff. YES
From that post install shell you can run pkg install -y u-boot-rpi3 then copy files to EFI.
 
WOW, I add all of that on my ToDo list which is growing everyday!
Thank you Phishfry

RPI4 can handle booting from USB almost OTB (depending on the SATA adapter), RPI3 it's also possible with the right hardware if I am not mistaken I've already read a blog post about it but yeah I understand that can be deal breaker if it's not working directly.
I've got a RP2,3 and 4 but that's it I'll stop there with SBC mainly because it's a lot of time spent in tinkering (even if it's fun to do ^^) while I could get the same result in no time with a "mini pc" x86, plus these days "mini pc" don't cost that much compared to SBC.

Sorry marcelohsp for hijacking your thread.
 
sysutils/edk2-rpi3 and sysutils/edk-rpi4 are also interesting ways to run a Pi.

See this is the trouble with flavors. They don't display correctly on FreshPorts.

You must view the master port to see the flavors.

/sysutils/edk2

Like my above example at the end of FreeBSD install go to post install shell, install needed edk2 package and copy files to your EFI partition.

Here are official instructions.
For Rpi4 on FreeBSD it would look something like this:
pkg install edk2-rpi4
cp /usr/local/share/edk2-rpi4/RPI_EFI.fd /boot/efi/
You may need to copy the board dtb as well.
That is another function bsdinstall does not handle for Arm.
The Board DTB. You will need to copy this as well even for U-Boot.
 
I was just looking at the aarch64 memstick image.

It does not contain any RaspberryPi u-boot files or the RPi DTB's needed.

You will need to build a Micro SD card with u-boot and dtb.

It really looks like the pre-built Raspberry Pi images are the best solution.

/boot/dtb/ contains no dtb for Pi.
So you must scrape files from our Pi pre-built image if you want to build an image manually.

I find a ports build for u-boot a good source of needed u-boot and dtb files
 
I am about to try this (without using bsdinstall) as I have a working FreeBSD-14.0-RC1 on pi4 and want to use a SSD connected via USB3. Once I finish I will post my notes here.
 
In the end this is what I did:
  1. Download the current[1] raspberryPi image, uncompress and dd it to a 32GB+ sdcard & bring up pi4 all the way.
  2. Plug in the usb ssd. Make sure it shows up as /dev/sda.
  3. Using rpi-eeprom-config -e, change the boot order[2] to 0x214 and reboot.
  4. Download the latest snapshot (rc3) & uncompress it. I did this on a faster machine but in a pinch the sdcard on pi4 can be used.
  5. dd < uncompressed-image > /dev/sda bs=4M -- this will copy the image to the ssd.
  6. Reboot. Given the chosen order, freebsd will boot from the usb ssd, resize the partition and eventually come up multiuser.
Next I added users, installed packages etc. etc. I did not bother with zfs.

[1] https://downloads.raspberrypi.com/r...2023-10-10-raspios-bookworm-arm64-full.img.xz

[2] Bootorder 0x214 says first try booting from usb, then the sdcard, then try netboot.
 
I might suggest 0xF214, so that it repeats again in the same order if NONE boot up. Read EEPROM Right to Left: 0x$; 0x4 Try from USB, 0x1 microSD Card, 0x2 last Netboot, 0xF repeat boot sequence again.

https://ghostbsd-arm64.blogspot.com/2023/07/learning-zfs-on-root-setup-for.html ZFS setup on 1 TB USB 3.0 SATA SSD. Manual method. Will work to improve this Rough WIP document.
Dec 18 2023 update https://ghostbsd-arm64.blogspot.com/2023/12/zfs-boot-on-root-setup-for-usb-ssd.html
Oct 12 2023 update https://ghostbsd-arm64.blogspot.com/2023/10/honey-i-broke-my-zfs-usb-sata-ssd-1-tb.html
 
Last edited:
Back
Top