How to boot FreeBSD installed on the sd card on the Khadas Edge-V instead of Android

Hello.

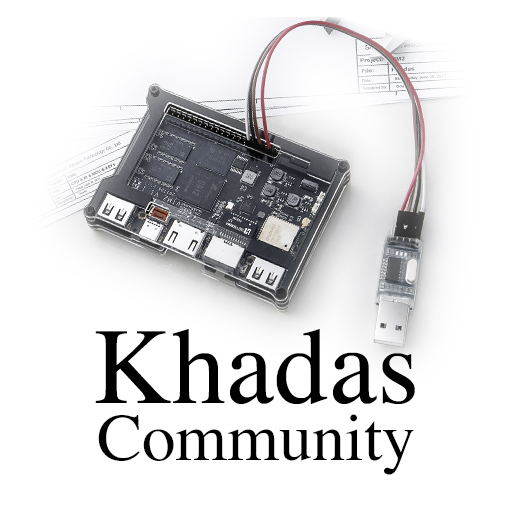
I’ve got the board Khadas Edge-V to my home. I’ve installed FreeBSD on the sd card and I would like to boot from it. But everytime that I turn on the board,Android boots instead of FreeBSD. How can I boot the board from the sd card ?

From here :


I read that :

Disconnect the power supply, insert the SD card, access the power supply, and press the Function Button three times within five seconds.Will boot from SD card

I tried,but it does not work. On my keyboard I don’t have Function Button,but the F (1-12) keys. which one is the right one ?
 
What's the right combination to boot FreeBSD that I've installed on the sd card ?
I'm trying this method :

Keys Mode (U-Boot is Running Normally)​

  1. Power on Edge.
  2. Long press the Function key without releasing it.
  3. Short press the ‘Reset’ key and release it.
  4. Count for 2 to 3 seconds, then release the ‘Function’ key to enter into Upgrade Mode. You will see the sys-led turn ON when you’ve entered Upgrade Mode (Loader Mode).
but it does not work. Android boots every time.
 
What happens if you hold down the Function button before powering on the Khadas (and only release it after it has powered on)?
 

Android does not boot ; FreeBSD does not boot....what happened ? At the moment the board is not usable at all.


Android still make the boot.
 
Let's say that I want to install FreeBSD into the eMMC. This seems to be the tutorial to follow :

https://khadas.github.io/linux/edge/InstallOsIntoEmmc.html

So. First of all,I read "Upgrade Using a USB-C Cable". So,I presume that I should attach the usb-c cable to my Linux workstation. And what should be the usb-c port that should be used on the khadas board ? the usb-c port that I use to power on the board or the other one ?

Later,it says that "there are two commands that can be used to burn linux/images: burn-tool and rk-burn-tool"

ok. I will use rk-burn-tool to install FreeBSD,using this command :

Code:
$ rk-burn-tool -i /mnt/KHADAS/FreeBSD/edge-freebsd-aarch64-13.0-release-20210613.img

Is this the correct procedure,in your opinion ?
 
My process goes like this. Prepare an SD-Card with u-boot for the platform.
I would make a custom port from the needed defconfig.

You need to interrupt the Android boot process and get the board to boot off your medium. Doing this can range from shorting jumpers to shorting pins on MMC to prevent it from booting. Once you get it to boot from your microSD card you can use u-boot to erase the eMMC contents. From there its smooth sailing.

For usb-host with rkflash you could probably blank the eMMC.
I would check to make sure there is no SPI-Flash to deal with.
Find out where the bootrom resides.
 
So. First of all,I read "Upgrade Using a USB-C Cable". So,I presume that I should attach the usb-c cable to my Linux workstation. And what should be the usb-c port that should be used on the khadas board ? the usb-c port that I use to power on the board or the other one ?
Usually the USB-C jack would be used for this. So the 'host' computer supplies the power and interface type. USB Gadgets or OTG it can be called.
There are loader entries you want for USB Host mode or OTG Mode. Some Rockchip boards have a slider switch and certain USB-A jack you must use for OTG.


I never played with rkflash/rkburn. The writing of firmware to device has like 5 steps written to addresses. I think you need to put the Khadis into maskrom mode with a button.
I have a bricked Firefly Face2 board that I need to wake up with rkflash'ing.
 
Hello bro.

I plan to install this image file :


to the EMMC of my Edge-V. Where I've got it ? I've unzipped the img file that I found here :


1) I've attached the board to my PC using the USB-C cable (not the power one),from the USB-C data port of the board to the USB-A port of my PC

2) on Linux Ubuntu 24.04,I'm going to do :

Code:
$ rk-burn-tool -i edge-freebsd-aarch64-13.0-release-20210613.img

I hope this is correct.
 
It really don't matter as long as you can blank the eMMC somehow. Are you sure its is not booting from SPI Flash?

Why are you using a FreeBSD 13.0 Image? Board has RK3399 right? Why not ROCKPRO64 14-3-RELEASE image?

Create a U-Boot port for it. That is literally all it needs once you blank MMC.

I don't know why you seem to ignore my advice about creating slave u-boot ports.

evadot@ has made it so easy for anyone messing with u-boot on unsupported boards.

Instead you are using a years old image. At this point you should be able to whip up a custom u-boot in 15 minutes.

13.0 (April 13, 2021)
 
Here is step by step what I do to build u-boot for this platform.

First off go to another boards build and look to see if defconfig file exists for this board. It does. Checking ./u-boot/configs/ directory.

/usr/ports/sysutils/u-boot-radxa-zero3/work/u-boot-2025.07-rc2/configs/khadas-edge-v-rk3399_defconfig

Do you understand this part? You are looking for a default configuration file for Khadis Edge V. I am using another port to do this.

You could just as easily build any board port for this u-boot source tree.

Once you have this information (the name of defconfig file) you can build a slave u-boot port for your unsupported board.

mkdir /usr/ports/sysutils/u-boot-khadis-edge-v

cd /usr/ports/sysutils/u-boot-khadis-edge-v

ee Makefile
Code:
MASTERDIR=      ${.CURDIR}/../u-boot-master

MODEL=          khadis-edge-v
BOARD_CONFIG=   khadas-edge-v-rk3399_defconfig
FAMILY=         rk3399

.include "${MASTERDIR}/Makefile"

Now create the package description file.
ee pkg-descr
Code:
U-Boot loader and related files for the khadis-edge-v

To install this bootloader on an sdcard just do:

dd if=/usr/local/share/u-boot/u-boot-khadis-edge-v/idbloader.img of=/path/to/sdcarddevice seek=64 conv=sync
dd if=/usr/local/share/u-boot/u-boot-khadis-edge-v/u-boot.itb of=/path/to/sdcarddevice seek=16384 bs=512 conv=sync

Now you can build your port.

Install dependencies:
make build-depends-list | cut -c 12- | xargs pkg install -A -y

Build it:
make install

Please make your own u-boot port for this board. It makes bringing up a board pretty easy.
 
---> Why not ROCKPRO64 14-3-RELEASE image

I've already installed FreeBSD 14.2 or 3 on the sd card that I use for booting the RockPro RK3399 board.
I think I can skip this part. I wanted to try with a FreeBSD image that I was sure it would have worked.

Anyway,actually I have another problem. I'm not able to put the Khadas in upgrade mode. If I don't do this step,nothing will work,because Android will boot everytime.

According with this instructions :


There are 5 ways to boot into upgrade mode. I tried TST ; Key mode ; Linux command line,but none of them worked.
Now I would like to try the Serial mode.

Serial mode : How to do :
  1. Connect Edge1 to PC with a USB-C cable.
  2. Refer to Setup Serial Tool to setup your Serial Tool for Edge1.
  3. Once again, make sure you’ve done the correct connections and setup.
  4. Hit SPACE on your keyboard at the moment of bootup to stop autoboot. This step will let Edge1 boot into U-Boot command line.
  5. Type run update in the terminal of U-Boot. The Sys LED (White) will turn ON when you’ve entered Upgrade Mode.
  6. Type run maskrom on the terminal of U-Boot as below, and you will enter Maskrom Mode.
Well.

Point 1 : I've connected the board to my PC using one USB-C cable to USB-C cable. The board is detected.

Point 2 : Refer to this instructions :


to setup your Serial Tool for Edge1. Ok. I'm trying to configure a serial connection between the board and the PC using one USB to TTL converter.

I've attached the red,blue and black wires according with the picture showed on this link :

https://docs.khadas.com/products/sbc/edge1/development/setup-serial-tool


WhatsApp Image 2025-07-08 at 22.57.19.jpeg


Now I should connect 5 wires to the 5 pins that you see on the converter. Can you tell me which colors go to which pins ?
Very thanks.


WhatsApp Image 2025-07-08 at 23.00.17.jpeg


2025-07-08 23 40 15.png
 
 
This is what I did. I've connected the USB to TTL converter to the USB port of my PC and now I see a red light on top of it.
Windows recognized it. I've also connected the USB-C cable from the USB-C data port of the board to the USB-C port of my nvidia rtx 2080 (the only usb-c port present on my PC) :

WhatsApp Image 2025-07-09 at 00.39.59.jpeg


At this point according with this tutorial :


I've installed,configured and launched SecureCRT :


WhatsApp Image 2025-07-09 at 00.41.16.jpeg


But unfortunately it does not connect....should I connect the board to the USB-C power port and not to the USB-C data port ?
 
Every method failed. The last one is "MRegister Mode(Maskrom Mode)" :


It says to use a tweezer to short-circuit the two pads of M register,but I would like to try a neodymium magnet :


to short-circuit the two pads of M register.

Do you think it will work ? I'm more comfortable with the magnet than with the tweezer.

How can I use the magnet ? Should I place one or two magnets ? One on top of each resistor or one only on top of one resistor ?
 
It says to use a tweezer to short-circuit the two pads of M register,but I would like to try a neodymium magnet :
I have to leave you on your own for now. You must hash this out. Serial port only needs 3 wires. You can test find ground with multimeter.

I assume those are instructions for shorting out the eMMC on bootup. It does get freaky. You should not need that level of care on a ARM board like this.
You ain't doing something right with the buttons.

I would try Armbian and you must stop u-boot at start-up to divert it.

Step One: Serial Console
Step Two: Bootup your microSD card with your u-boot on it. You need to interrupt u-boot at startup. The <Space-Key> is your escape sequence. Jam the button over and over until you break it.
 
Looking at this thread there is an SPI Flash onboard. You could be barking up the wrong tree. Maybe bootrom is on SPI Flash.
You can erase that from u-boot as well.


Many times you can short out the 40pin header SPI pins to defeat bootrom on SPI-Flash
 
I have to leave you on your own for now. You must hash this out. Serial port only needs 3 wires. You can test find ground with multimeter.

I assume those are instructions for shorting out the eMMC on bootup. It does get freaky. You should not need that level of care on a ARM board like this.
You ain't doing something right with the buttons.

I would try Armbian and you must stop u-boot at start-up to divert it.

Step One: Serial Console
Step Two: Bootup your microSD card with your u-boot on it. You need to interrupt u-boot at startup. The <Space-Key> is your escape sequence. Jam the button over and over until you break it.

I recorded some videos to show what I do with the buttons :

 
I don't know what happened bro,I didn't touch any button,but Ubuntu has been able to boot from the sd card in serial mode. Now I should repeat the steps until it happens again...at least I know that the serial connection is well made and that I should use the cable USB-C / OTG...

WhatsApp Image 2025-07-09 at 23.19.58.jpeg
 
If you plan on doing video work on this board you should put a heatsink on CPU/GPU. Anything is better than nothing.

rk3399 run fine without heatsink but you fire up MALI and you need some heatsink.
 
Since you have Ubuntu up use it to probe the hardware.
Is SPI Flash empty? Is ubuntu booting from u-boot and where. That is what you need to consider.
 
If you plan on doing video work on this board you should put a heatsink on CPU/GPU. Anything is better than nothing.

rk3399 run fine without heatsink but you fire up MALI and you need some heatsink.

Thanks. Infact I realized it when I touched the cpu and I felt that its temperature was high and ubuntu started rebooting itself in loop.
 
Back
Top