Yes you read it correctly. The fabulous ZFS Boot Environments – more about them here – https://is.gd/BECTL – if you are not familiar with this concept – are now also possible on UFS filesystems on FreeBSD. Of course in little different form and without using snapshots and clones but the idea and solution remains. You can now have bootable backups of your system before major changes and/or upgrades. This solution does not use UFS snapshots. All bootable UFS variants are supported with and without Soft Updates or Soft Updates Journaling. The idea behind UFS Boot Environments lays in several additional root (/) partitions that will be used as alternate boot environments. In this article I will show you how to setup new FreeBSD system with 3 of such partitions. In my honest opinion its more then enough for most purposes. On my desktop/workstation I have more then 1000 packages installed. With FreeBSD Base System it takes about 11 GB of space with ZFS compression and 15 GB without it. Thus I propose 16 GB partitions. Your needs may of course be different. You may as well create 4 GB or 64 GB partitions.
The UFS Boot Environments would not exist without the inspiration from FreeBSD Upgrade Procedure Using GPT blog post by Mariusz Zaborski (also known as oshogbo) who describes the concept of bootme flags for GPT partitions. That is the heart of this solution. By selecting activate for boot environment the bootme flag is removed from all existing boot environments and set for the new desired one. The ufsbe(8) tool was tested on FreeBSD 12.x and 13.x currently.
Generally only GPT partitioning is needed to use UFS Boot Environments. Below I will show example install process with 3 root partitions of 16 GB each.
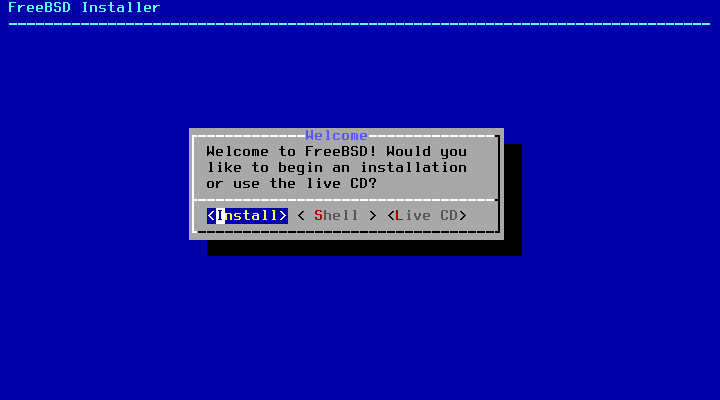
In the FreeBSD Installer select Install.
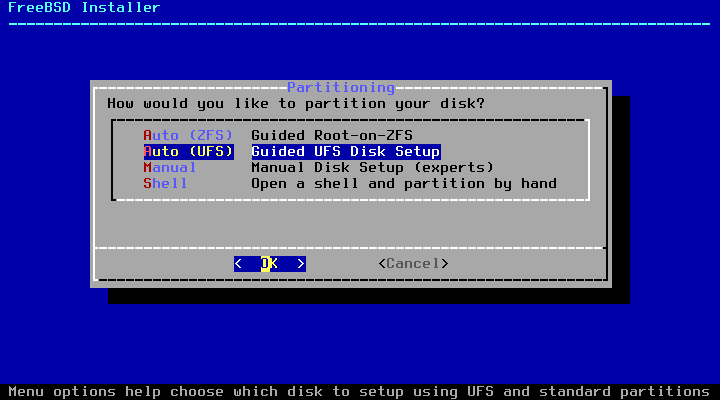
The select Auto (UFS) option.
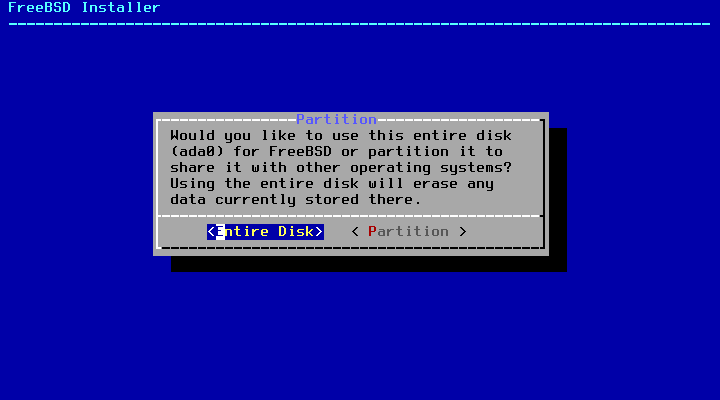
Then use Entire Disk option.
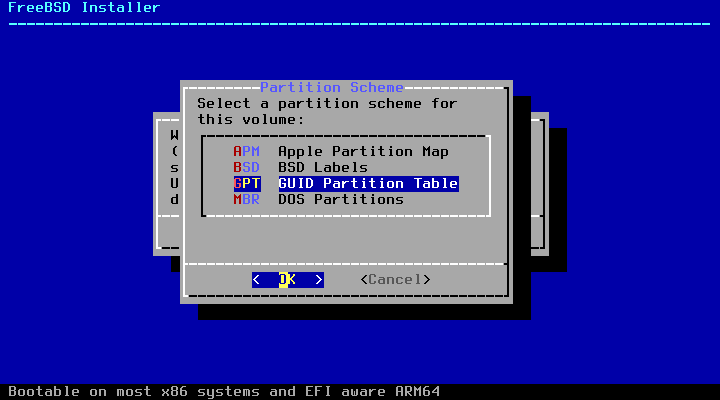
Then select GPT partition table.
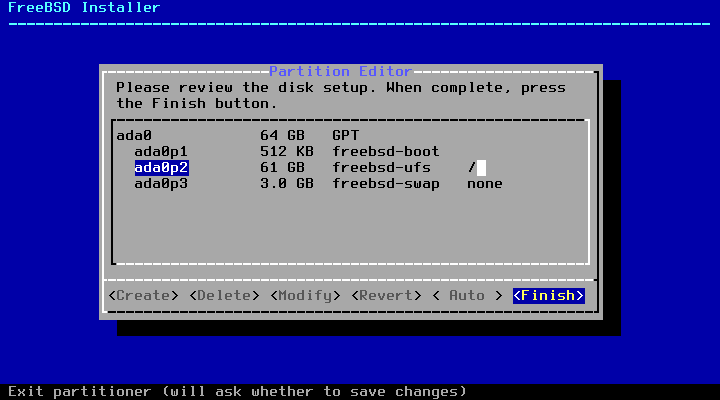
The FreeBSD Installer will propose the following solution.
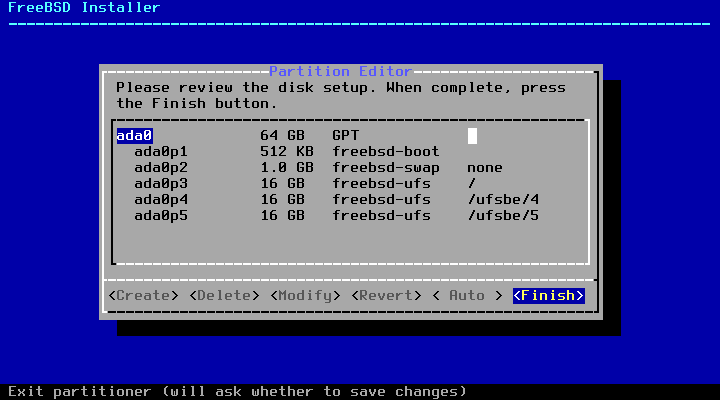
Change it into 3 partitions 16 GB each to make it look like that one below and hit Finish.
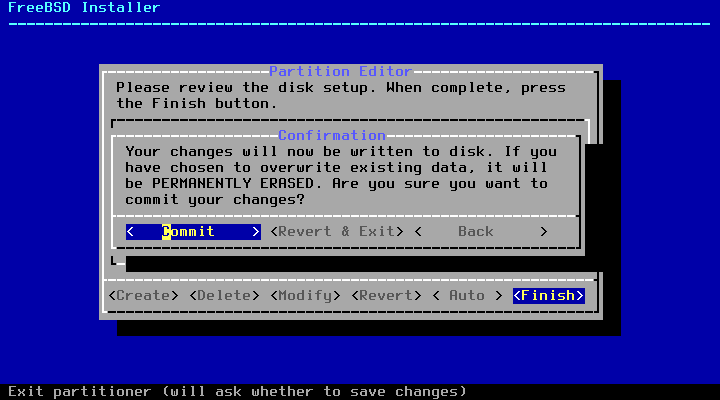
Then Commit your choice.
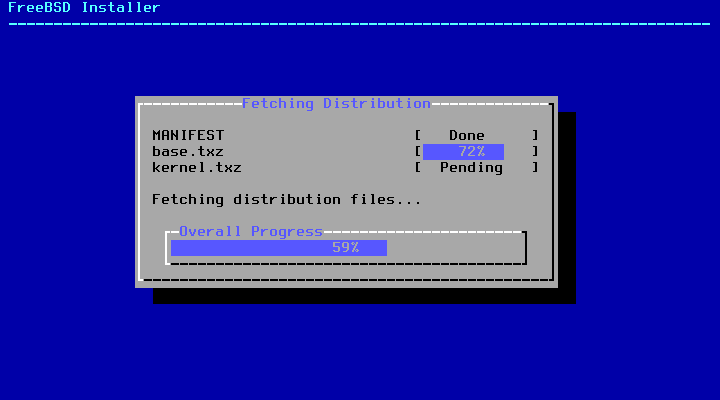
… and then the install process will continue as usual.
Besides these option you may select whatever you choose in the install process.
After the system reboots its gpart(8) will look like that one below.
root@fbsd13:~ # gpart show
=> 40 134217648 ada0 GPT (64G)
40 1024 1 freebsd-boot (512K)
1064 2097152 2 freebsd-swap (1.0G)
2098216 33554432 3 freebsd-ufs (16G)
35652648 33554432 4 freebsd-ufs (16G)
69207080 33554432 5 freebsd-ufs (16G)
102761512 31456176 - free - (15G)
Now fetch(1) the ufsbe.sh script from its GitHub page.
# fetch https://raw.githubusercontent.com/vermaden/ufsbe/main/ufsbe.sh
# chmod +x ./ufsbe.sh
# ./ufsbe.sh
NOPE: did not found boot environment setup with 'ufsbe' label
INFO: setup each boot environment partition with appropriate label
HELP: list all 'freebsd-ufs' partitions type:
# gpart show -p | grep freebsd-ufs
2098216 33554432 ada0p3 freebsd-ufs [bootme] (16G)
35652648 33554432 ada0p4 freebsd-ufs (16G)
69207080 33554432 ada0p5 freebsd-ufs (16G)
HELP: to setup partitions 3/4/5 as boot environments type:
# gpart modify -i 3 -l ufsbe/3 ada0
# gpart modify -i 4 -l ufsbe/4 ada0
# gpart modify -i 5 -l ufsbe/5 ada0
It will welcome you with information about needed setup steps.

We will now make these steps marking all boot environment partitions with appropriate ufsbe labels.
# gpart modify -i 3 -l ufsbe/3 ada0
ada0p3 modified
# gpart modify -i 4 -l ufsbe/4 ada0
ada0p4 modified
# gpart modify -i 5 -l ufsbe/5 ada0
ada0p5 modified
Now ufsbe.sh will setup bootme flag for currently used root (/) partition.
# ./ufsbe.sh
INFO: flag 'bootme' successfully set on / filesystem
usage:
ufsbe.sh list
ufsbe.sh activate
ufsbe.sh sync
Setup is complete.
All three root partitions have the ufsbe label. To make it more simple the /dev/ada0p3 device gets the ufsbe/3 label and /dev/ada0p4 device gets the ufsbe/4 … you see the pattern.
# gpart show -p -l
=> 40 134217648 ada0 GPT (64G)
40 1024 ada0p1 (null) (512K)
1064 2097152 ada0p2 swap (1.0G)
2098216 33554432 ada0p3 ufsbe/3 [bootme] (16G)
35652648 33554432 ada0p4 ufsbe/4 (16G)
69207080 33554432 ada0p5 ufsbe/5 (16G)
102761512 31456176 - free - (15G)
You can now use our UFS Boot Environments on this system.
Lets list our boot environments with list command. The short ‘l‘ option also works.
# ./ufsbe.sh list
PROVIDER LABEL ACTIVE
ada0p3 ufsbe/3 NR
ada0p4 ufsbe/4 -
ada0p5 ufsbe/5 -
Its output is similar to mine ZFS Boot Environments tools beadm(8). The N flag shows that this is the boot environments we are using NOW. The R flag shows which one we will use after the reboot(8).
Currently only the 3 boot environments is populated (by FreeBSD Installer that is). The 4 and 5 boot environments are empty filesystems.
You can either extract your own FreeBSD version there with base.txz and kernel.txz or use the sync option of ufsbe.sh which will use rsync(1) for the process. Below is an example of syncing boot environment 3 (the one we installed) with currently empty boot environment 4.
# ./ufsbe.sh sync 3 4
NOPE: rsync(1) is not available in ${PATH}
INFO: install 'net/rsync' package or port
# pkg install net/rsync
# ./ufsbe.sh sync 3 4
INFO: syncing '3' (source) => '4' (target) boot environments ...
INFO: boot environments '3' (source) => '4' (target) synced
You can now see that boot environment 3 and 4 have same size.
# df -h
Filesystem Size Used Avail Capacity Mounted on
/dev/ada0p3 15G 1.3G 13G 9% /
devfs 1.0K 1.0K 0B 100% /dev
/dev/ada0p4 15G 1.2G 13G 9% /ufsbe/4
/dev/ada0p5 15G 32M 14G 0% /ufsbe/5
If we would like to activate an empty boot environment 5 then ufsbe.sh will not let us do that because that will make our system unbootable. Of course is quote fast/naive check but at least makes sure some files exists on the soon to be active boot environment. Currently these files are checked but this list may be increased in the future:
Below this ‘protection’ in action.
# ./ufsbe.sh activate 5
NOPE: boot environment '5' is not complete
INFO: critical file '/ufsbe/5/boot/kernel/kernel' is missing
INFO: use 'sync' option or copy file manually
The boot environment 4 activation process works as desired as we populated it with files from boot environment 3 first.
# ./ufsbe.sh activate 4
INFO: boot environment '4' now activated
Same as with beadm(8) the ufsbe.sh also checks if boot environment is already activated.
# ./ufsbe.sh activate 4
INFO: boot environment '4' is already active
The list of our boot environments looks like that now.
# ./ufsbe.sh list
PROVIDER LABEL ACTIVE
ada0p3 ufsbe/3 N
ada0p4 ufsbe/4 R
ada0p5 ufsbe/5 -
… and that is how output of gpart(8) looks like.
# gpart show -p -l
=> 40 134217648 ada0 GPT (64G)
40 1024 ada0p1 (null) (512K)
1064 2097152 ada0p2 swap (1.0G)
2098216 33554432 ada0p3 ufsbe/3 (16G)
35652648 33554432 ada0p4 ufsbe/4 [bootme] (16G)
69207080 33554432 ada0p5 ufsbe/5 (16G)
102761512 31456176 - free - (15G)
We will now reboot into the activated boot environment 4.
# shutdown -r now
After the reboot(8) we see that we are now booted from the 4 boot environment.
# ./ufsbe.sh list
PROVIDER LABEL ACTIVE
ada0p3 ufsbe/3 -
ada0p4 ufsbe/4 NR
ada0p5 ufsbe/5 -
Keep in mind that this is only first 0.1 version of ufsbe.sh. Do not use it in production or important systems and make sure you have restorable backups. Like with beadm(8) in the past I plan to improve it with more useful options and also add it to the Ports tree in the future.
Feel free to share your thoughts about this tool.
I must wait till midnight to make it shown as posted on 2nd of April because if I would post it on 1st of April it would be taken as April Fool Joke which is definitely not.
Enjoy.
You may use the Upgrade FreeBSD with ZFS Boot Environments method with these UFS Boot Environments as well but now you will chroot(8) into /ufsbe/4 for example.
EOF
Continue reading...
The UFS Boot Environments would not exist without the inspiration from FreeBSD Upgrade Procedure Using GPT blog post by Mariusz Zaborski (also known as oshogbo) who describes the concept of bootme flags for GPT partitions. That is the heart of this solution. By selecting activate for boot environment the bootme flag is removed from all existing boot environments and set for the new desired one. The ufsbe(8) tool was tested on FreeBSD 12.x and 13.x currently.
FreeBSD Install for UFS Boot Environments
Generally only GPT partitioning is needed to use UFS Boot Environments. Below I will show example install process with 3 root partitions of 16 GB each.
In the FreeBSD Installer select Install.
The select Auto (UFS) option.
Then use Entire Disk option.
Then select GPT partition table.
The FreeBSD Installer will propose the following solution.
Change it into 3 partitions 16 GB each to make it look like that one below and hit Finish.
Then Commit your choice.
… and then the install process will continue as usual.
Besides these option you may select whatever you choose in the install process.
After the system reboots its gpart(8) will look like that one below.
root@fbsd13:~ # gpart show
=> 40 134217648 ada0 GPT (64G)
40 1024 1 freebsd-boot (512K)
1064 2097152 2 freebsd-swap (1.0G)
2098216 33554432 3 freebsd-ufs (16G)
35652648 33554432 4 freebsd-ufs (16G)
69207080 33554432 5 freebsd-ufs (16G)
102761512 31456176 - free - (15G)
Now fetch(1) the ufsbe.sh script from its GitHub page.
# fetch https://raw.githubusercontent.com/vermaden/ufsbe/main/ufsbe.sh
# chmod +x ./ufsbe.sh
# ./ufsbe.sh
NOPE: did not found boot environment setup with 'ufsbe' label
INFO: setup each boot environment partition with appropriate label
HELP: list all 'freebsd-ufs' partitions type:
# gpart show -p | grep freebsd-ufs
2098216 33554432 ada0p3 freebsd-ufs [bootme] (16G)
35652648 33554432 ada0p4 freebsd-ufs (16G)
69207080 33554432 ada0p5 freebsd-ufs (16G)
HELP: to setup partitions 3/4/5 as boot environments type:
# gpart modify -i 3 -l ufsbe/3 ada0
# gpart modify -i 4 -l ufsbe/4 ada0
# gpart modify -i 5 -l ufsbe/5 ada0
It will welcome you with information about needed setup steps.
We will now make these steps marking all boot environment partitions with appropriate ufsbe labels.
# gpart modify -i 3 -l ufsbe/3 ada0
ada0p3 modified
# gpart modify -i 4 -l ufsbe/4 ada0
ada0p4 modified
# gpart modify -i 5 -l ufsbe/5 ada0
ada0p5 modified
Now ufsbe.sh will setup bootme flag for currently used root (/) partition.
# ./ufsbe.sh
INFO: flag 'bootme' successfully set on / filesystem
usage:
ufsbe.sh list
ufsbe.sh activate
ufsbe.sh sync
Setup is complete.
All three root partitions have the ufsbe label. To make it more simple the /dev/ada0p3 device gets the ufsbe/3 label and /dev/ada0p4 device gets the ufsbe/4 … you see the pattern.
# gpart show -p -l
=> 40 134217648 ada0 GPT (64G)
40 1024 ada0p1 (null) (512K)
1064 2097152 ada0p2 swap (1.0G)
2098216 33554432 ada0p3 ufsbe/3 [bootme] (16G)
35652648 33554432 ada0p4 ufsbe/4 (16G)
69207080 33554432 ada0p5 ufsbe/5 (16G)
102761512 31456176 - free - (15G)
You can now use our UFS Boot Environments on this system.
Using UFS Boot Environments
Lets list our boot environments with list command. The short ‘l‘ option also works.
# ./ufsbe.sh list
PROVIDER LABEL ACTIVE
ada0p3 ufsbe/3 NR
ada0p4 ufsbe/4 -
ada0p5 ufsbe/5 -
Its output is similar to mine ZFS Boot Environments tools beadm(8). The N flag shows that this is the boot environments we are using NOW. The R flag shows which one we will use after the reboot(8).
Currently only the 3 boot environments is populated (by FreeBSD Installer that is). The 4 and 5 boot environments are empty filesystems.
You can either extract your own FreeBSD version there with base.txz and kernel.txz or use the sync option of ufsbe.sh which will use rsync(1) for the process. Below is an example of syncing boot environment 3 (the one we installed) with currently empty boot environment 4.
# ./ufsbe.sh sync 3 4
NOPE: rsync(1) is not available in ${PATH}
INFO: install 'net/rsync' package or port
# pkg install net/rsync
# ./ufsbe.sh sync 3 4
INFO: syncing '3' (source) => '4' (target) boot environments ...
INFO: boot environments '3' (source) => '4' (target) synced
You can now see that boot environment 3 and 4 have same size.
# df -h
Filesystem Size Used Avail Capacity Mounted on
/dev/ada0p3 15G 1.3G 13G 9% /
devfs 1.0K 1.0K 0B 100% /dev
/dev/ada0p4 15G 1.2G 13G 9% /ufsbe/4
/dev/ada0p5 15G 32M 14G 0% /ufsbe/5
If we would like to activate an empty boot environment 5 then ufsbe.sh will not let us do that because that will make our system unbootable. Of course is quote fast/naive check but at least makes sure some files exists on the soon to be active boot environment. Currently these files are checked but this list may be increased in the future:
- /boot/kernel/kernel
- /boot/loader.conf
- /etc/rc.conf
- /rescue/ls
- /bin/ls
- /sbin/fsck
- /usr/bin/su
- /usr/sbin/chroot
- /lib/libc.so.*
- /usr/lib/libpam.so.*
Below this ‘protection’ in action.
# ./ufsbe.sh activate 5
NOPE: boot environment '5' is not complete
INFO: critical file '/ufsbe/5/boot/kernel/kernel' is missing
INFO: use 'sync' option or copy file manually
The boot environment 4 activation process works as desired as we populated it with files from boot environment 3 first.
# ./ufsbe.sh activate 4
INFO: boot environment '4' now activated
Same as with beadm(8) the ufsbe.sh also checks if boot environment is already activated.
# ./ufsbe.sh activate 4
INFO: boot environment '4' is already active
The list of our boot environments looks like that now.
# ./ufsbe.sh list
PROVIDER LABEL ACTIVE
ada0p3 ufsbe/3 N
ada0p4 ufsbe/4 R
ada0p5 ufsbe/5 -
… and that is how output of gpart(8) looks like.
# gpart show -p -l
=> 40 134217648 ada0 GPT (64G)
40 1024 ada0p1 (null) (512K)
1064 2097152 ada0p2 swap (1.0G)
2098216 33554432 ada0p3 ufsbe/3 (16G)
35652648 33554432 ada0p4 ufsbe/4 [bootme] (16G)
69207080 33554432 ada0p5 ufsbe/5 (16G)
102761512 31456176 - free - (15G)
We will now reboot into the activated boot environment 4.
# shutdown -r now
After the reboot(8) we see that we are now booted from the 4 boot environment.
# ./ufsbe.sh list
PROVIDER LABEL ACTIVE
ada0p3 ufsbe/3 -
ada0p4 ufsbe/4 NR
ada0p5 ufsbe/5 -
Closing Notes
Keep in mind that this is only first 0.1 version of ufsbe.sh. Do not use it in production or important systems and make sure you have restorable backups. Like with beadm(8) in the past I plan to improve it with more useful options and also add it to the Ports tree in the future.
Feel free to share your thoughts about this tool.
I must wait till midnight to make it shown as posted on 2nd of April because if I would post it on 1st of April it would be taken as April Fool Joke which is definitely not.
Enjoy.
Updating or Upgrading
You may use the Upgrade FreeBSD with ZFS Boot Environments method with these UFS Boot Environments as well but now you will chroot(8) into /ufsbe/4 for example.
EOF
Continue reading...